
Let's Set up your menu for your kiosk, waiter terminal and Kayana App. Learn how to update your menu: add images, change prices and more.
-
If you need to edit a menu you do not have access to, please contact a teammate with Owner privileges.
Editing menus
Open the Menus screen on the partners portal and click on the menu tab on the left-hand side.
You can now edit various things on the menu by clicking on them directly.
Three Tier System
Kayana operates a three tier menu on its digital menu- Menu
- Menu is the heading shown on the left hand side of the kiosk giving a simple explanation of what is in that section
- Category
- The category is a sub-division of the menu, simple example if the menu is burgers, categories would be chicken, beef or vegetable burgers
- Item
- Item is the actual item name, in the case of the above example of burgers, the item would be cheeseburgers, beefburgers, chicken burgers, spicy zinger burger etc.
- Menu
-
- Options
- An option is anything the customer has to choose from, for example in a meal deal the option could be a choice of drinks or a choice of fries, please note in options you cannot charge extra money like an upgrade.
- .
- Extras
- An extra is anything you may need to charge for or have more than one choice. for example in a meal deal, an extra would be upgraded to a large size, add a milkshake is another example
- .
- Options
In all menu items, you can upload images fo the item, images are important to ensure the menus look good, pictures say a thousand words and poor pictures can be off-putting to customers.
Setting up Your Menu
The first step is to understand the flow of the menu and add the top menu items.
Adding Menu Items
Click on Menu on the left menu pane.
Click the purple add button and select the menu.
you will see the below screen
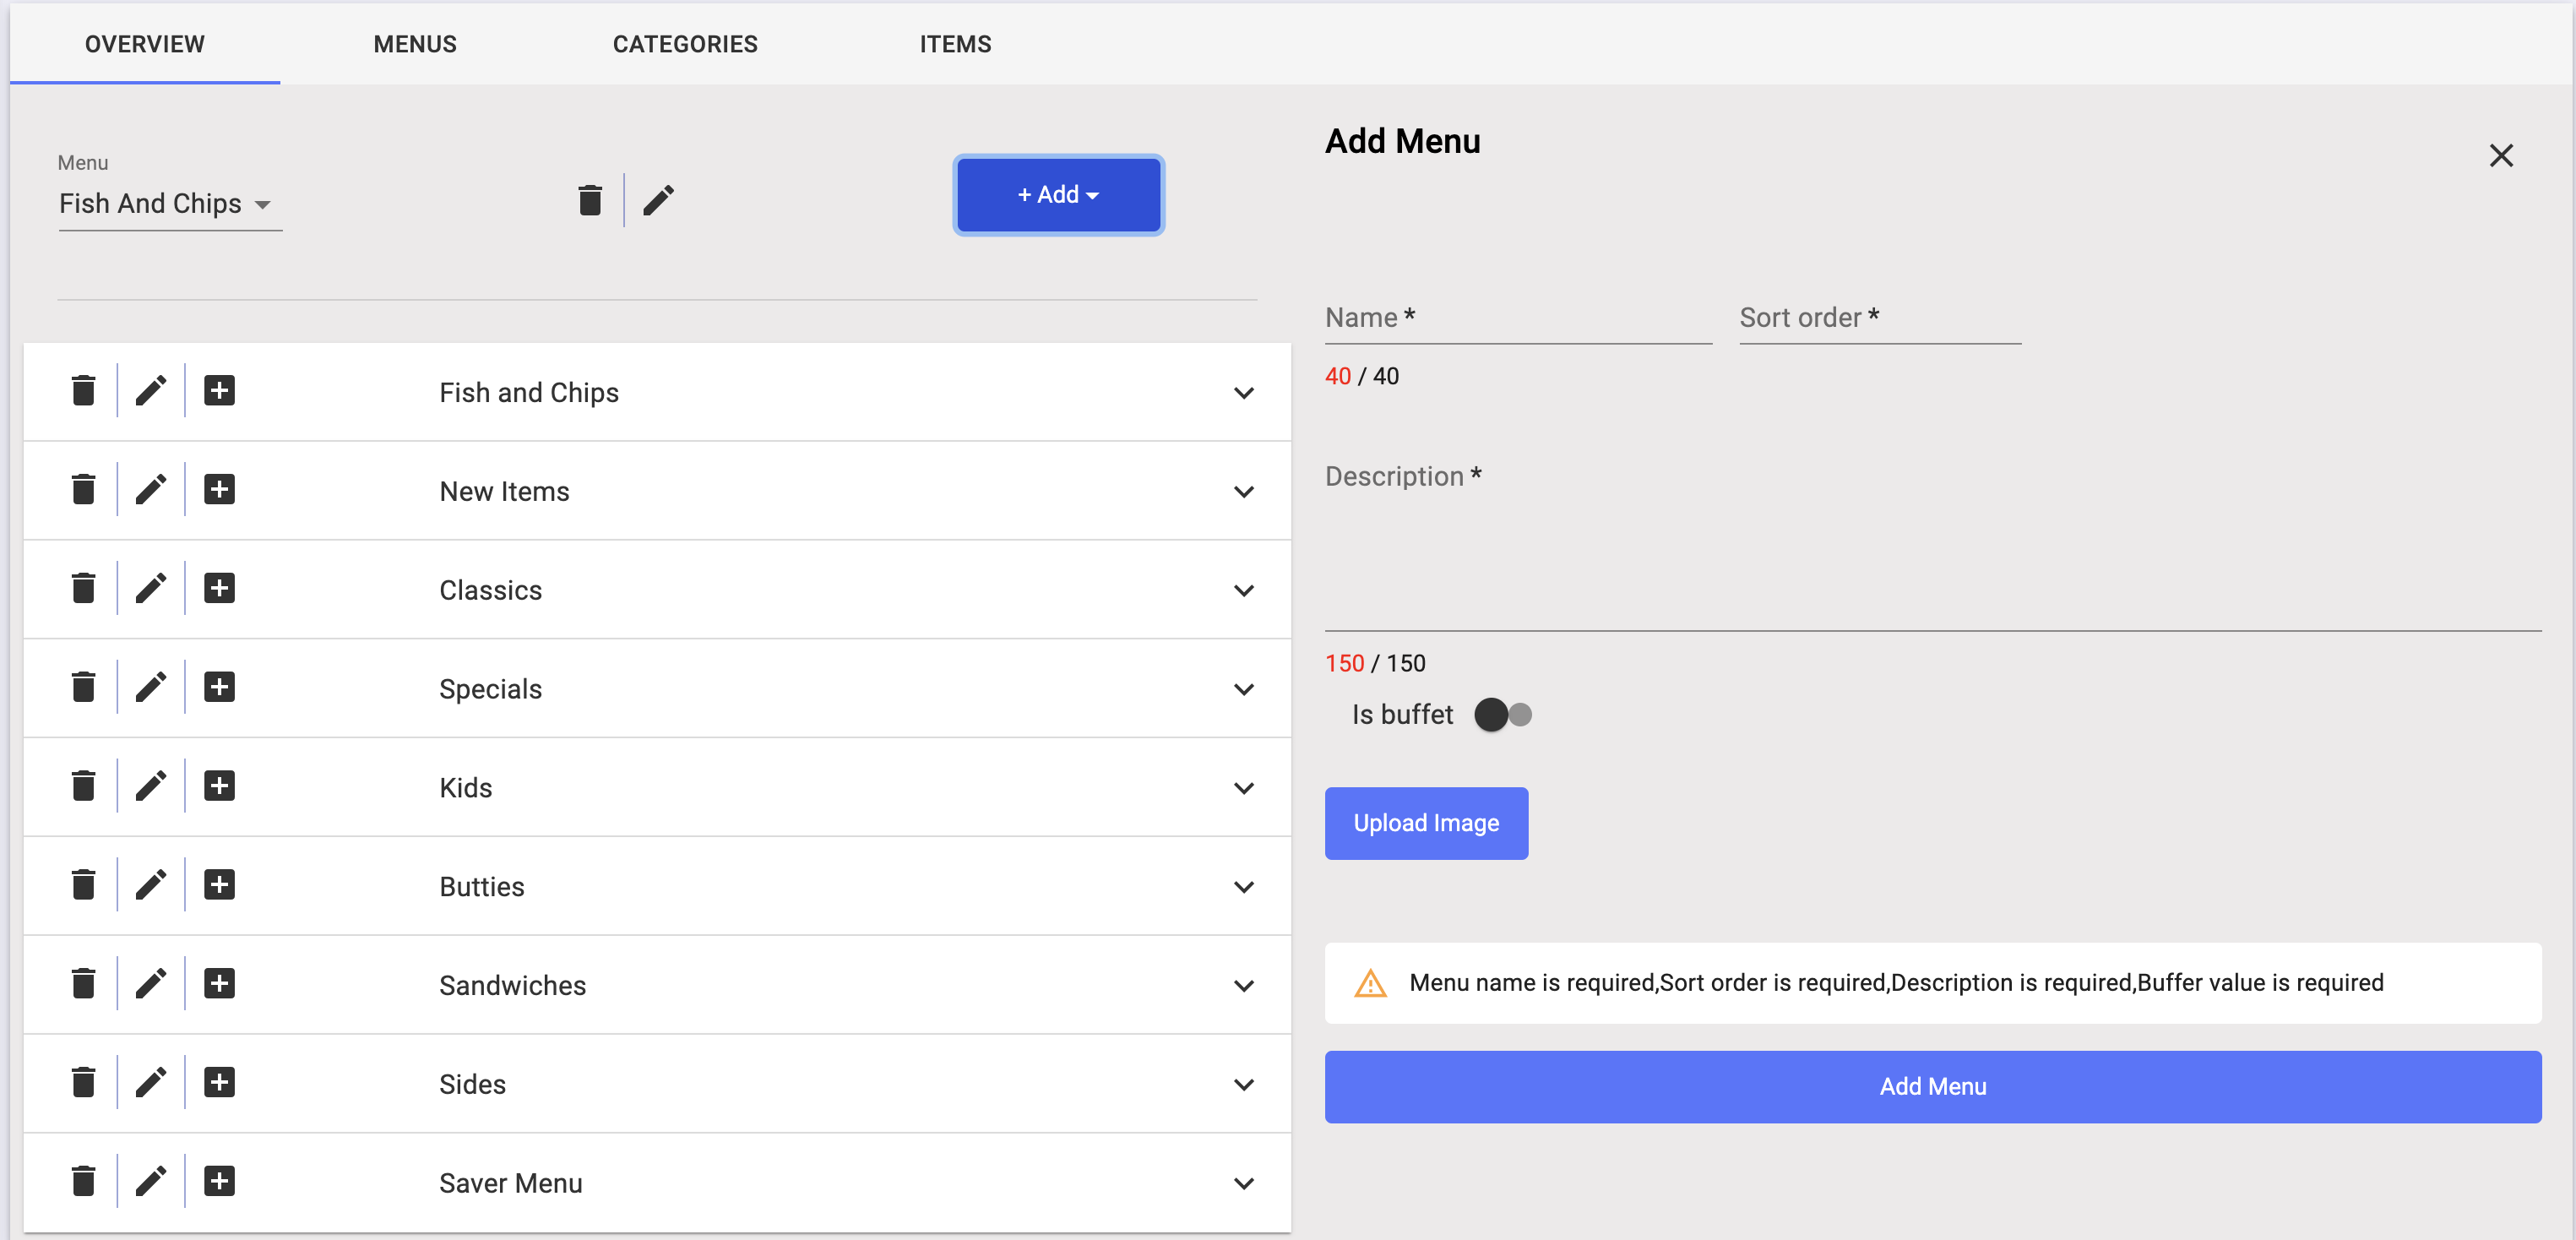
In the name field add the name of the menu
In the sort order choose a number the lower the number the higher the menu will show in the list
for example, if drinks are one and burgers are 10, drinks would be first.
Add a brief description of what the menu consist of this is for your own records.
If you have an image you would like to upload you can add it here
and click add menu.
Adding categories
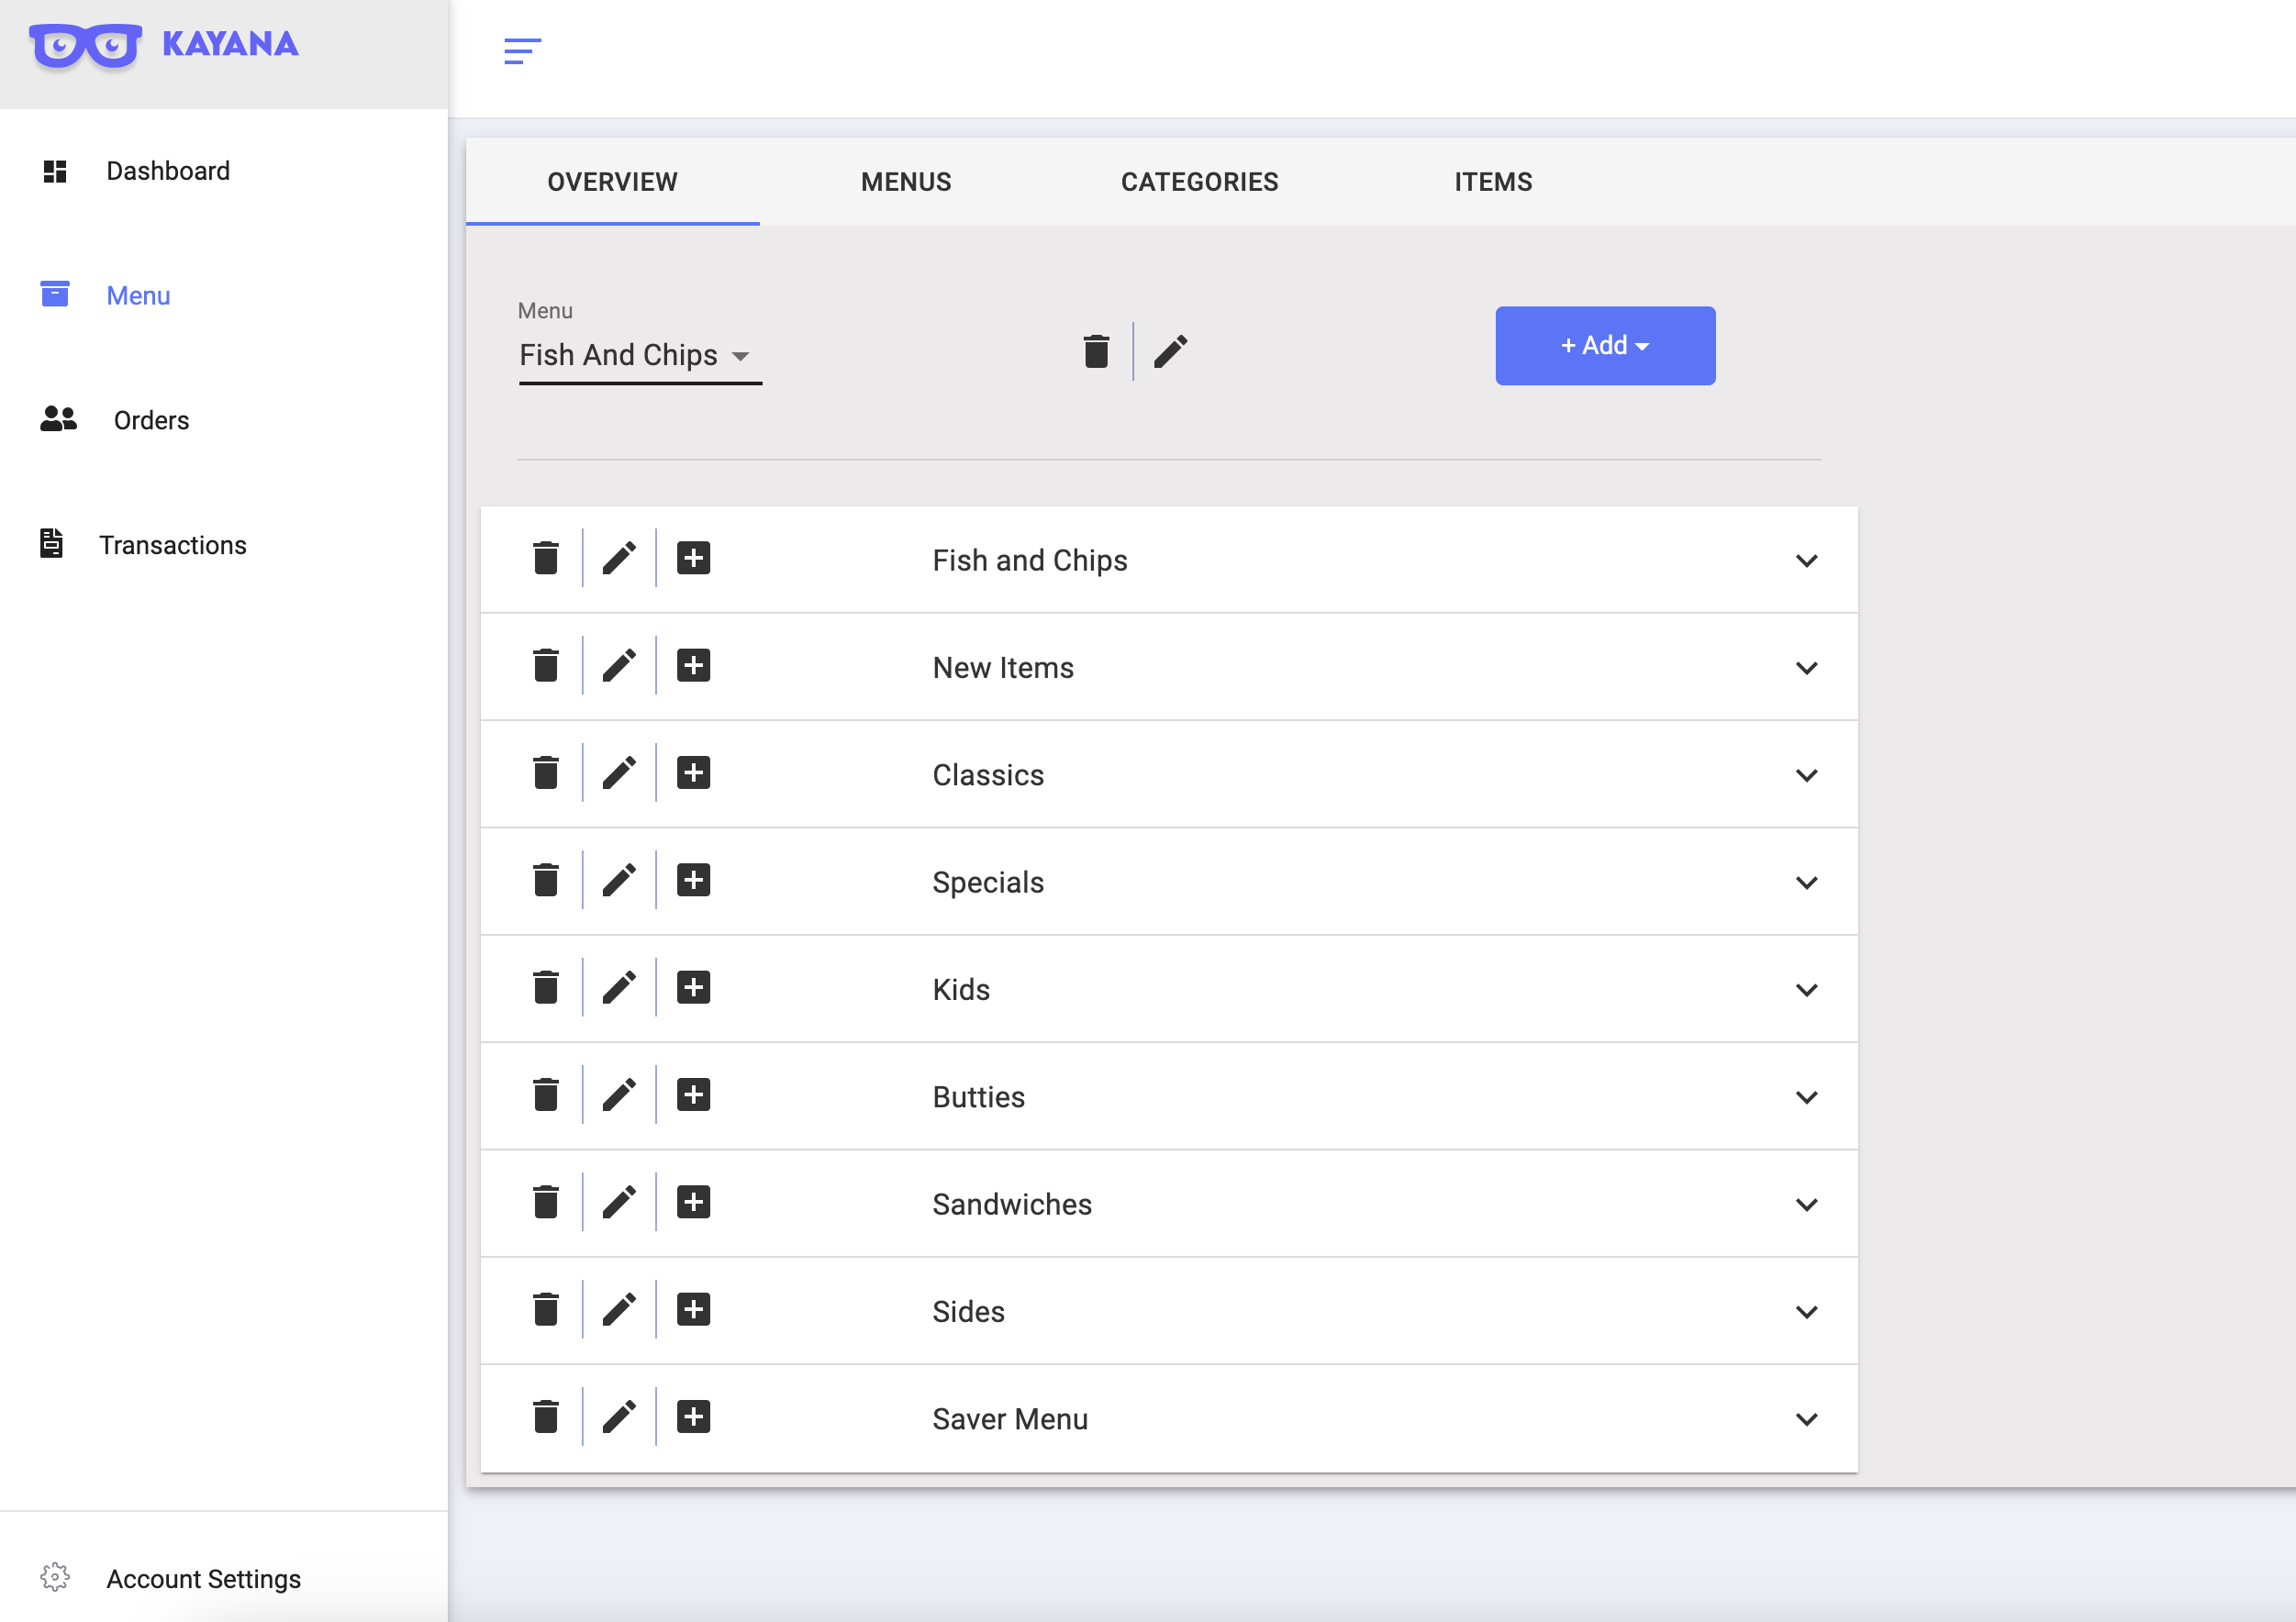
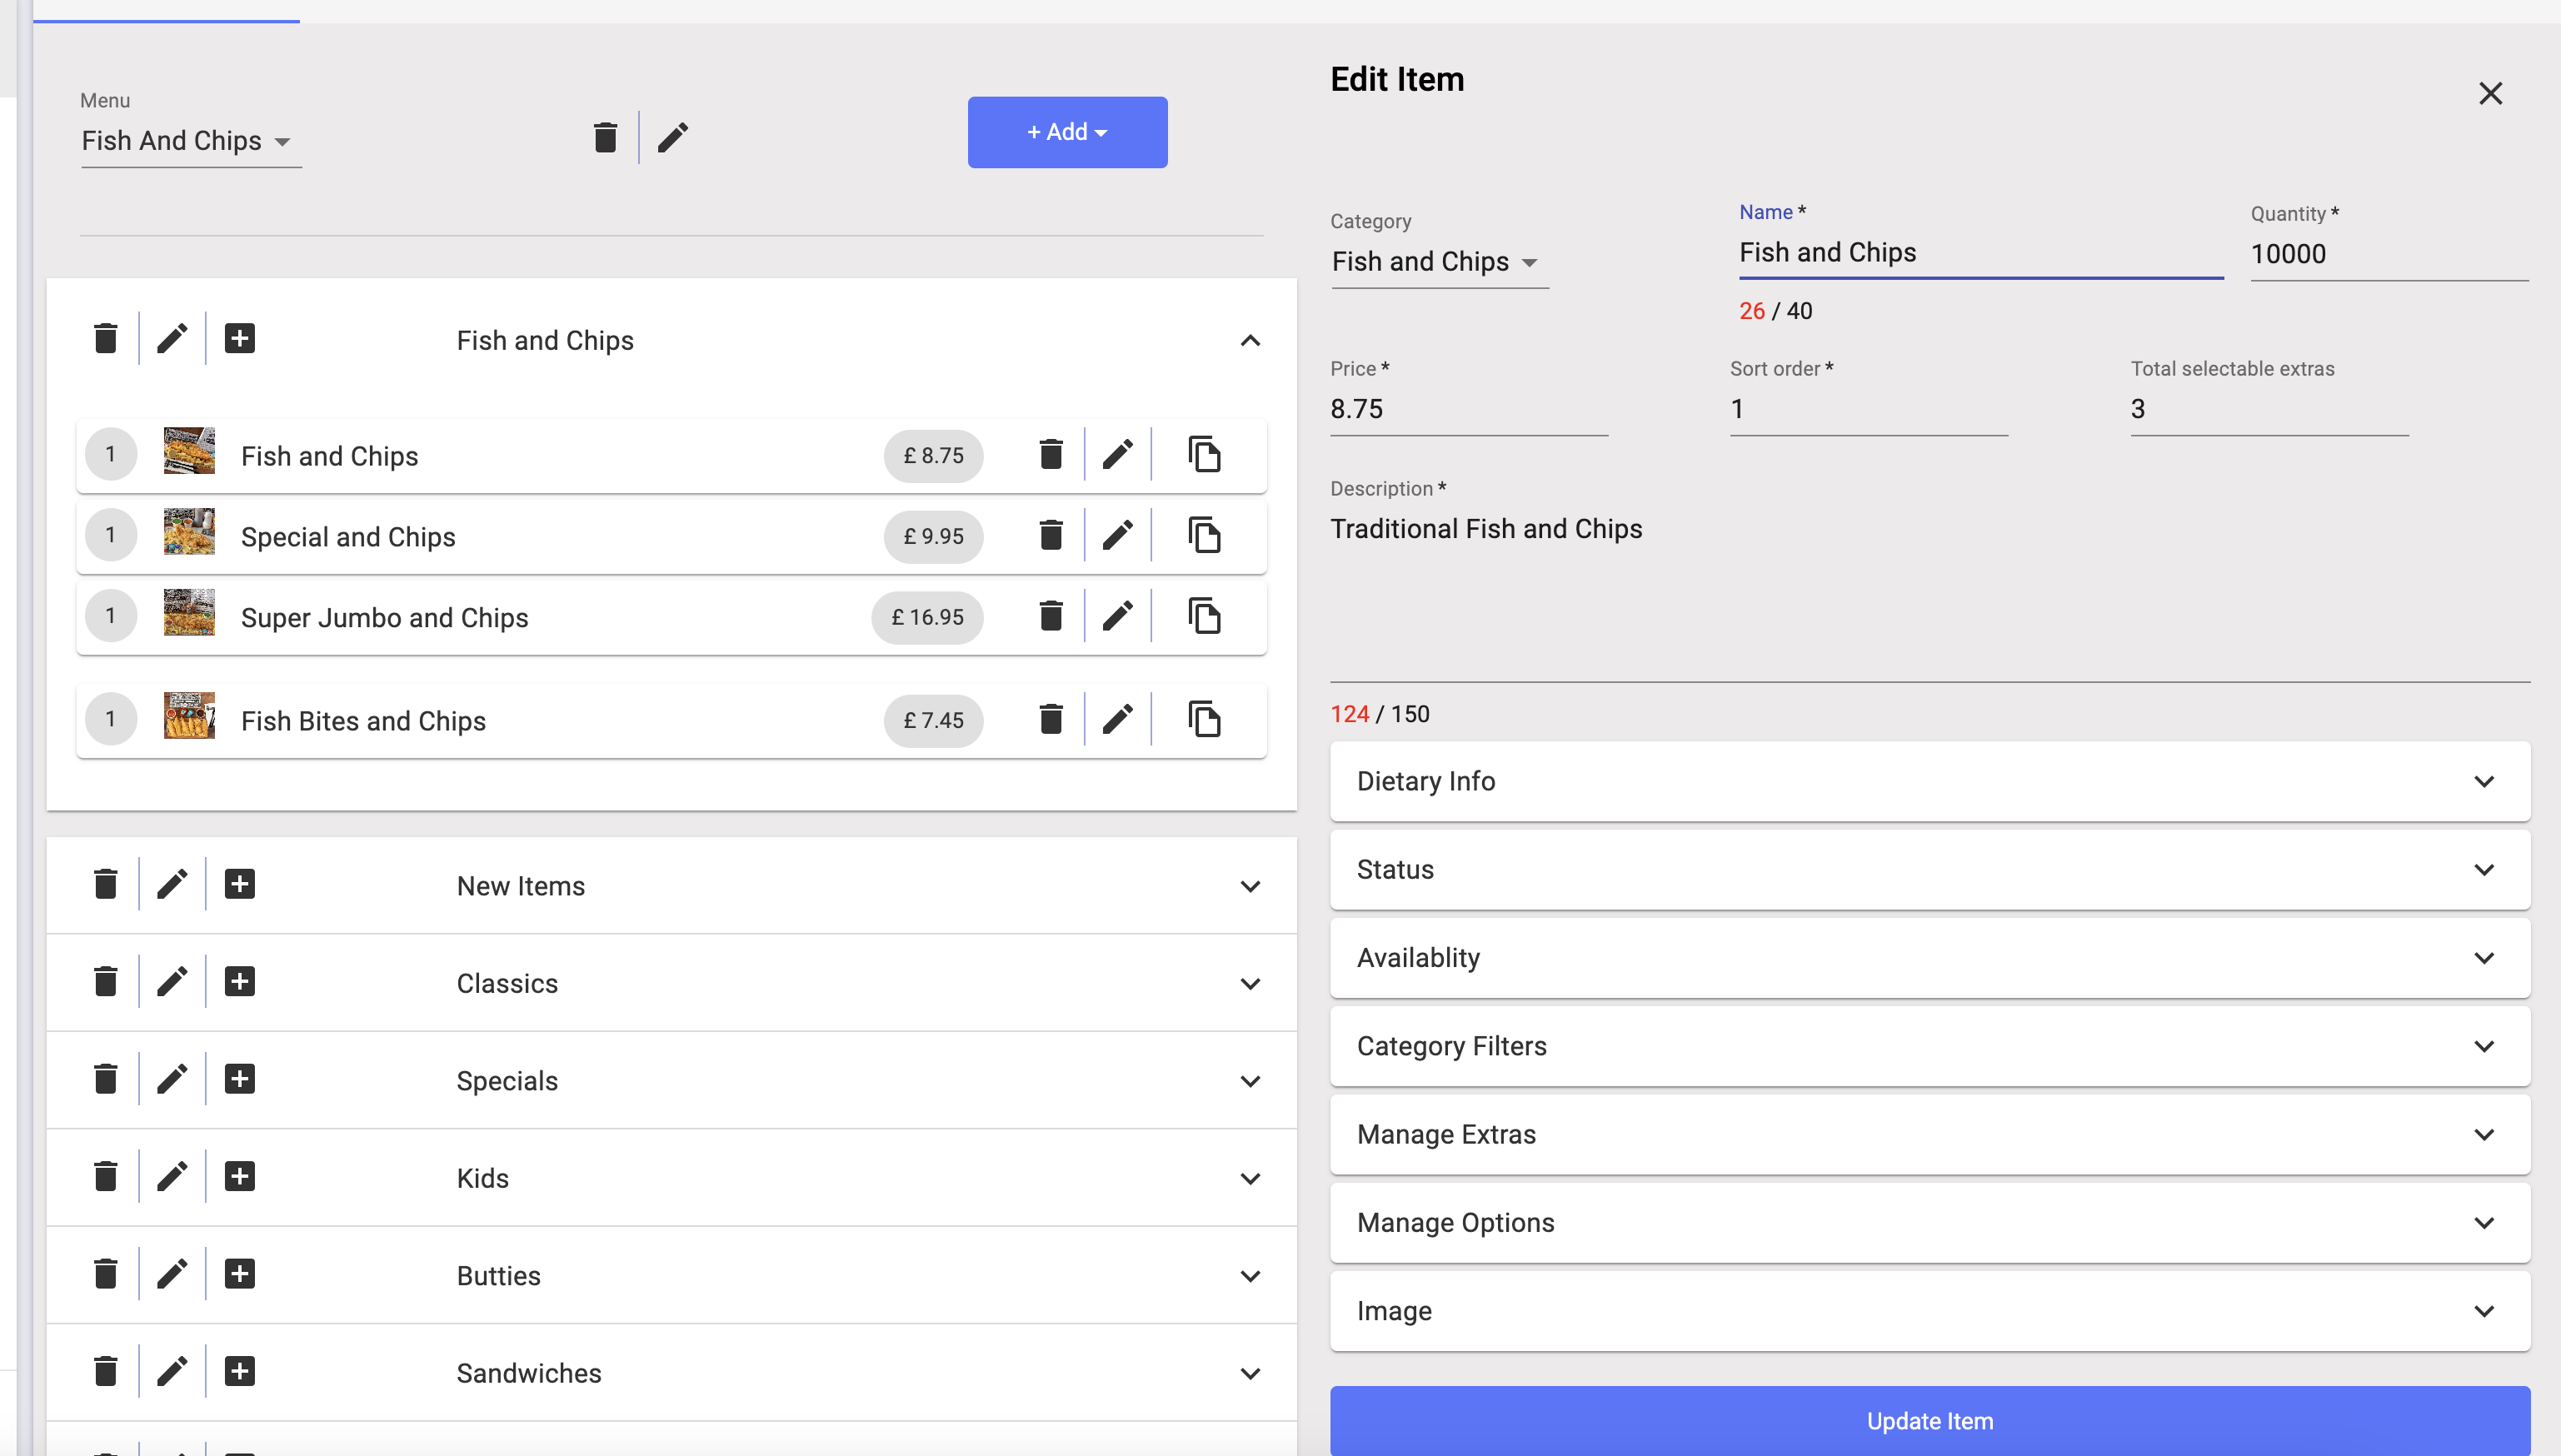
In the below picture, you can see the categories laid out as Fish and Chips, New Items, Classics and specials among many more.
To add another category select the menu option you want to add the category in and click add a category.
it should look like the below screenshot.

Make sure you are on the right menu
in this case, we are in fish and chips
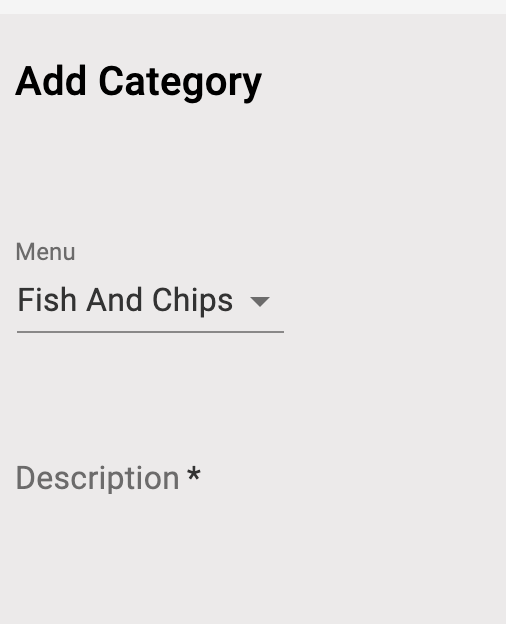
Now continue to complete the fields
Add the name of the category
add sort order of category
add description
Add an image and click add a category.
Adding an Item
In the below picture, you can see the items listed in the fish and chips category.
To add another item select the category option you want to add the item in and click add an item.

Once you click the plus, the right-hand side looks like above
Here you add the name of the icon, and quantity (if you want to manage inventory, if you do not intend to manage inventory, just add 10000)
Add the price of the item
Choose the sort order of the item.
How many items can be selected as extras for this item|?
This is important as if you have a burger, you don't want customers adding 50 extras as the burger would not handle that well.
A description of the item, for example, a cheeseburger with fresh lamb mince, cheddar cheese, tomato and cucumber.
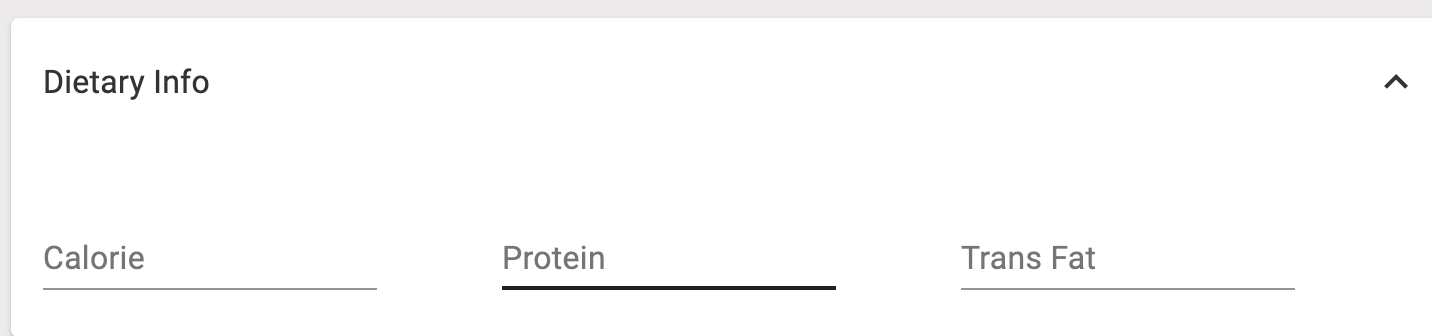
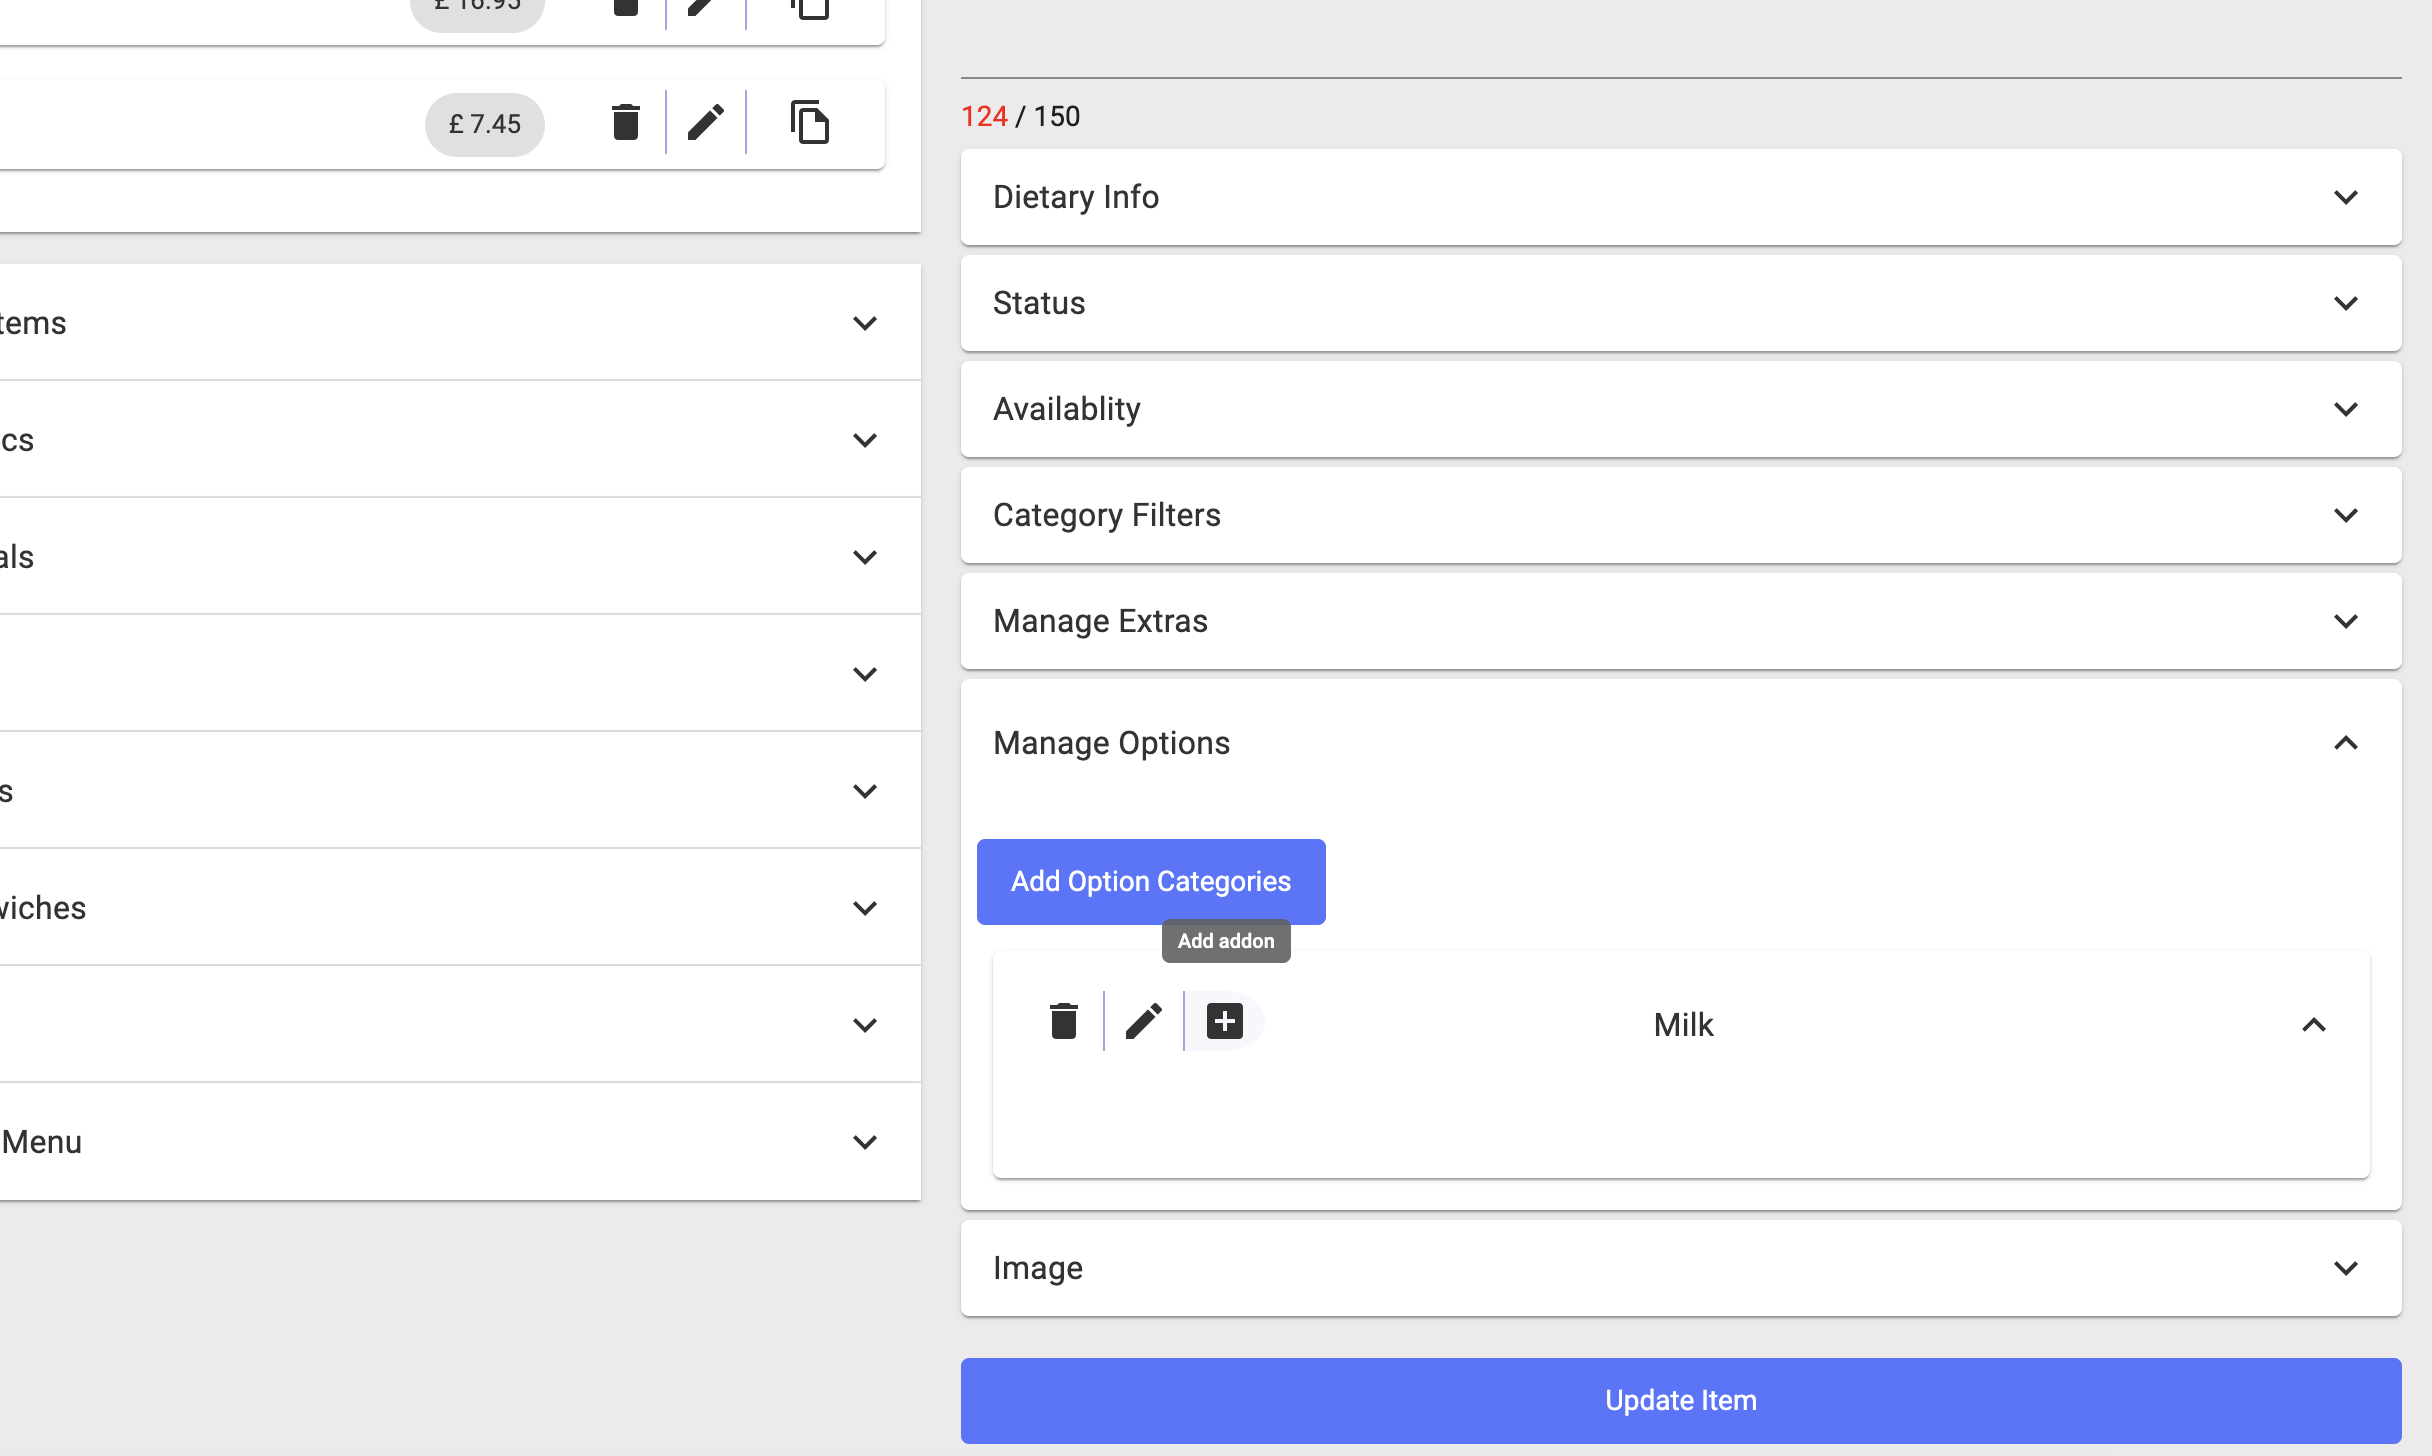
Next, click on the dietary info tab, and her you can add calories, fats, and protein information.
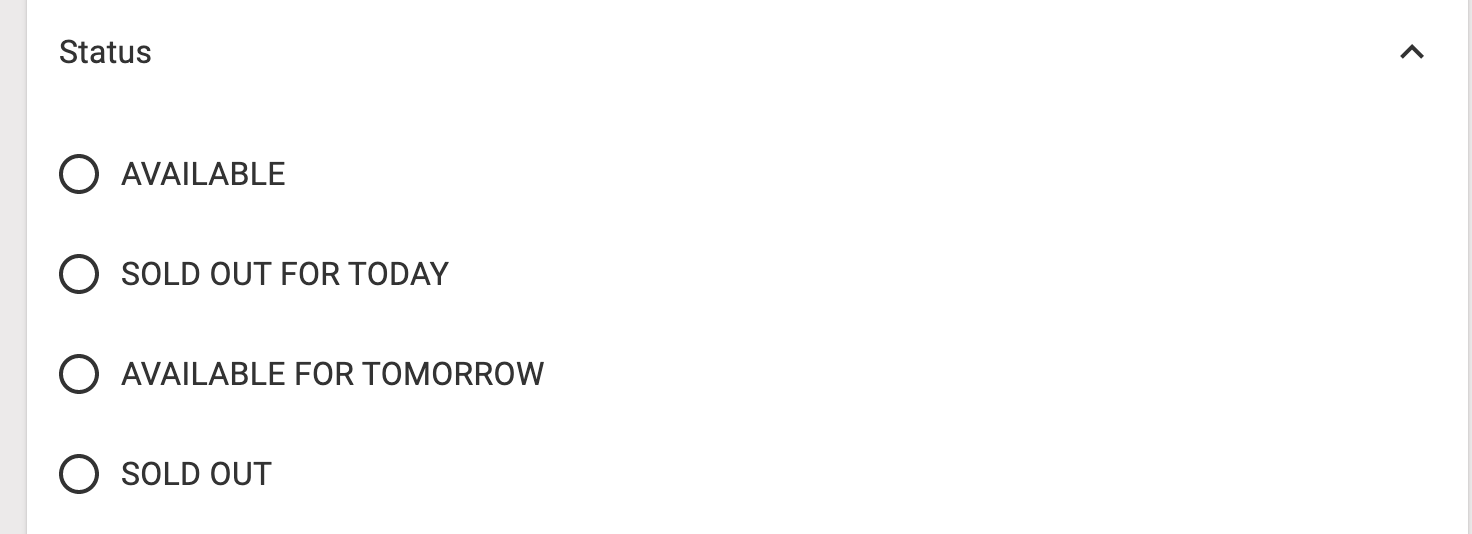
Status makes the item available or not available.
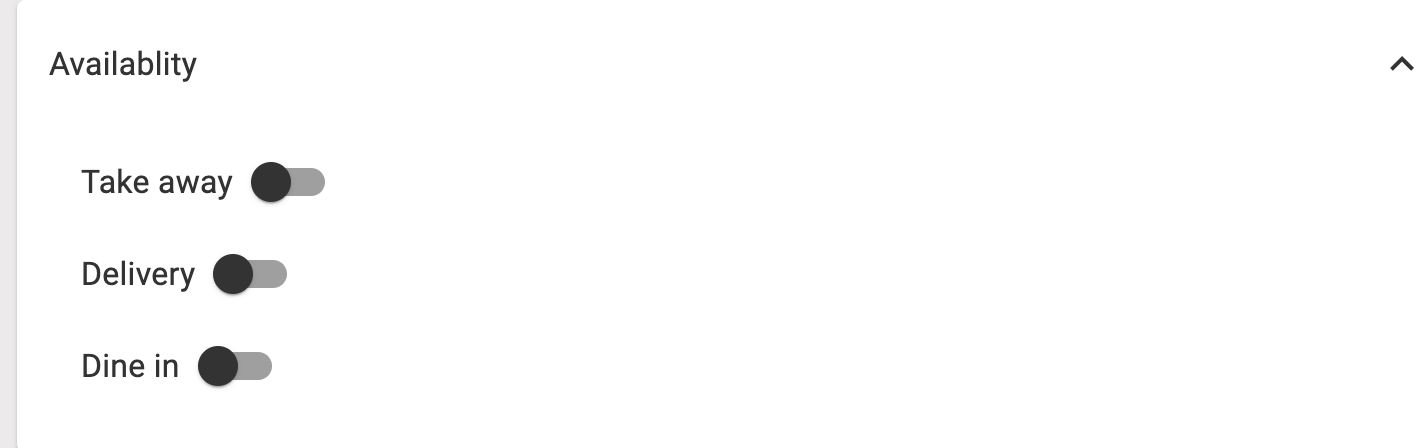
Availability shows the item for takeaway, delivery or dine-in on the app ad self-service kiosk.
The next step is to upload your image 
Click the upload image button
Next

Click Choose File

Crop the image and click save changes.
Once you click save changes the item can be added by clicking the add item button.
After it has been added it's now time to add some options and extras.
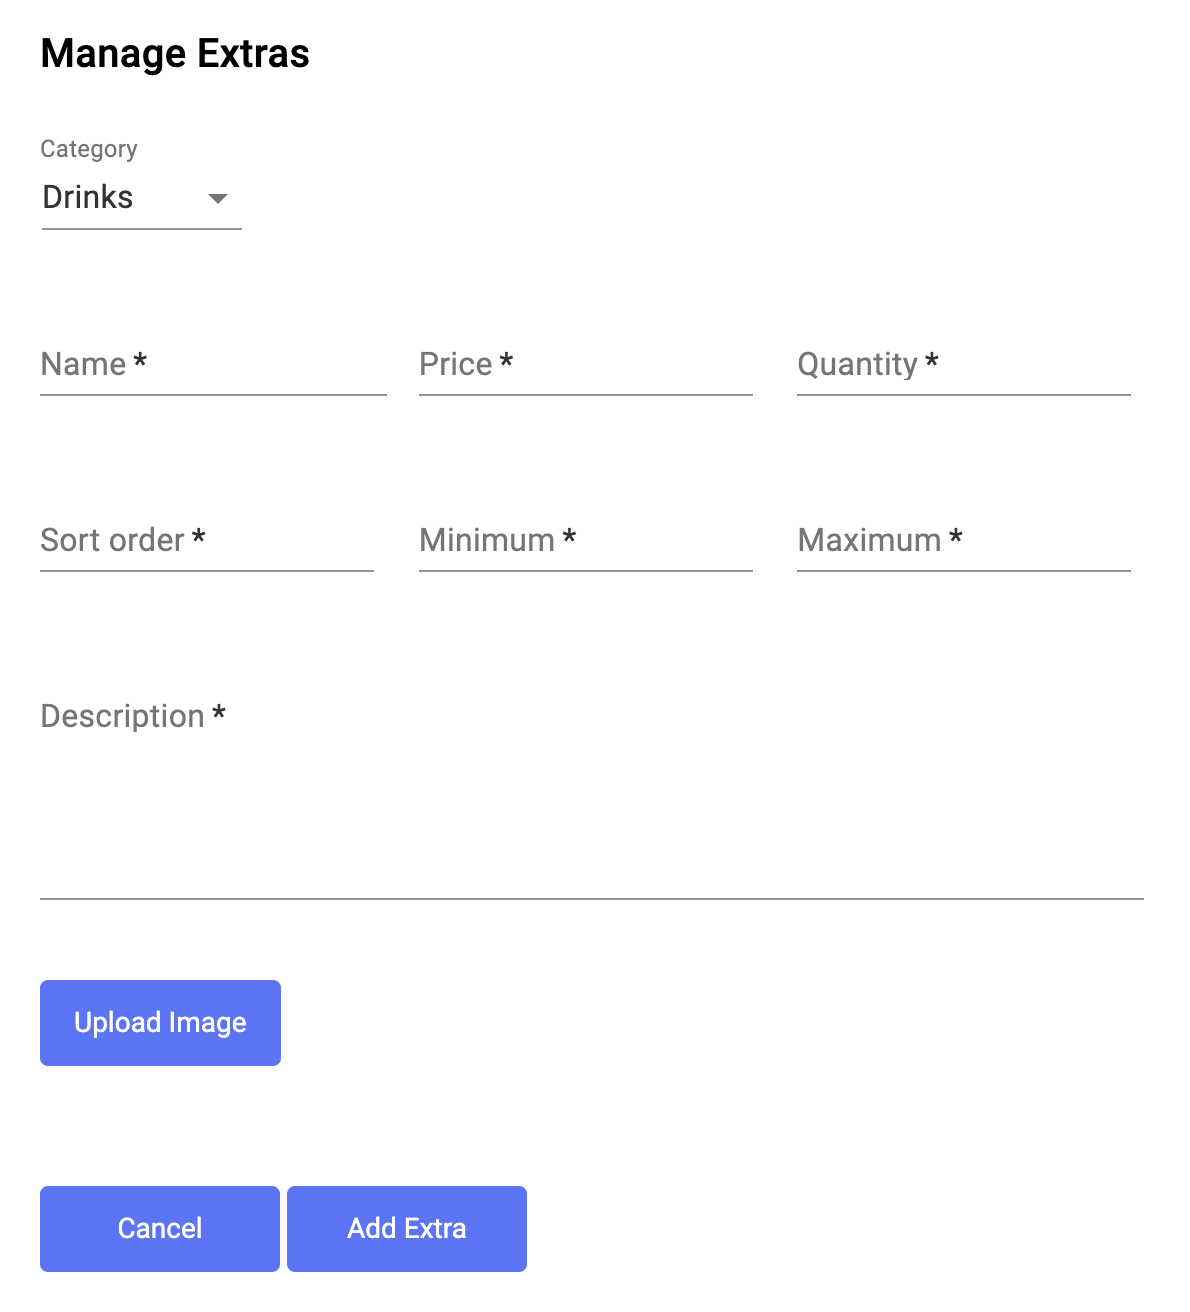
Adding Extras
Click the pencil icon in the photo below I am editing fish and chips.
Click manage Extras

Click add extra categories
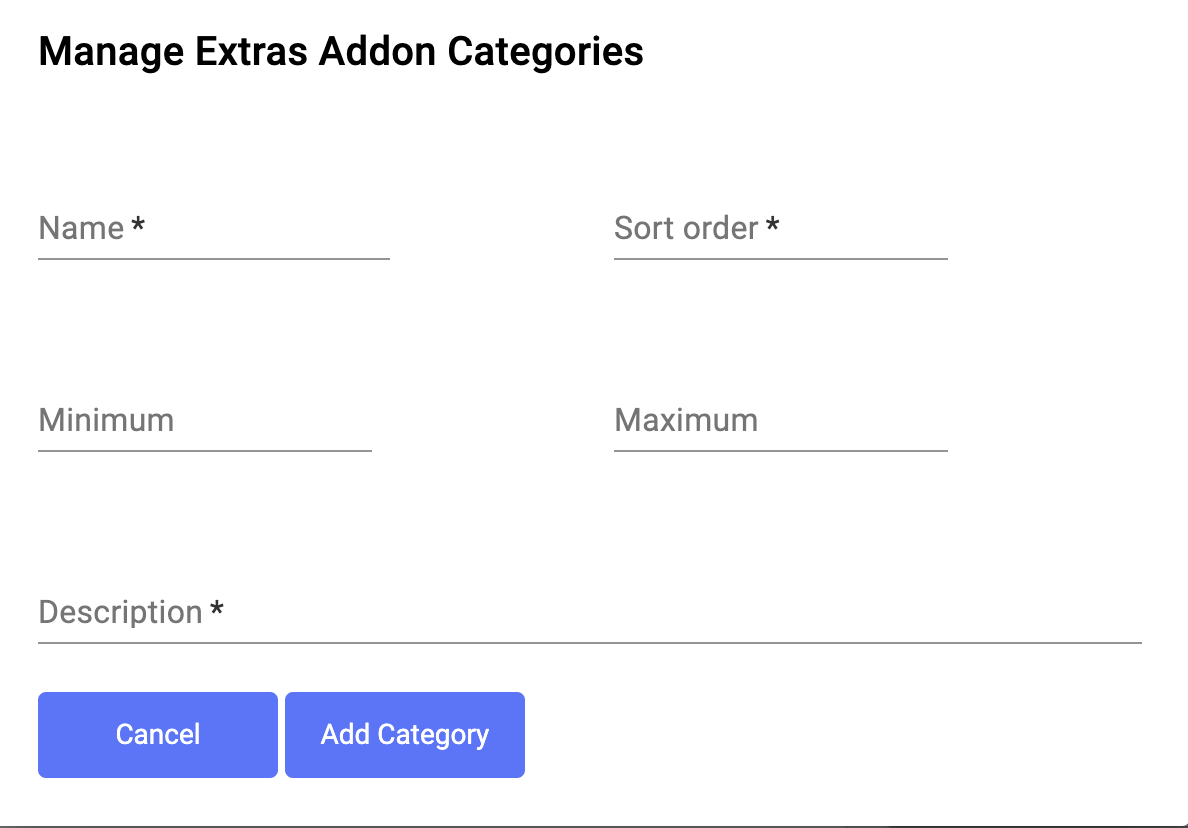
Add the name of the category, sort order (remember this is how it will be ranked in order).
What is the minimum extra amounts (example 0 if no extra needs to be chosen, or one if mandatory to choose one extra).
What is the maximum extra amounts (example 5 if this is the maximum permitted).
A brief description of the extras (example, please select your fries)
Click Add Category.
Once category is added you can add your extras like below

Click the plus sign to start adding your extras
It will look like below
Add the name of the extra, the price and how much stock of the extra you have(inventory reasons).
Add the sort order number to rank in choice,
What is the minimum extra amounts (example 0 if no extra needs to be chosen, or one if mandatory to choose one extra).
What is the maximum extra amounts (example 5 if this is the maximum permitted).
A brief description of the extras (example, Spciy Fries in rich peri peri salt)
Adding Options
Options are choices, some examples are listed below.
Exmaple one
Choice of milk in coffee
Oat Milk
Full Fat
Half Fat
Almond Milk
Example Two
Choice of drinks in meal deal
Coke
Fanta
Sprite
To add options its very similar to extras but its a choice of one.
to start with we need to add the category.

Click Add Option Categories
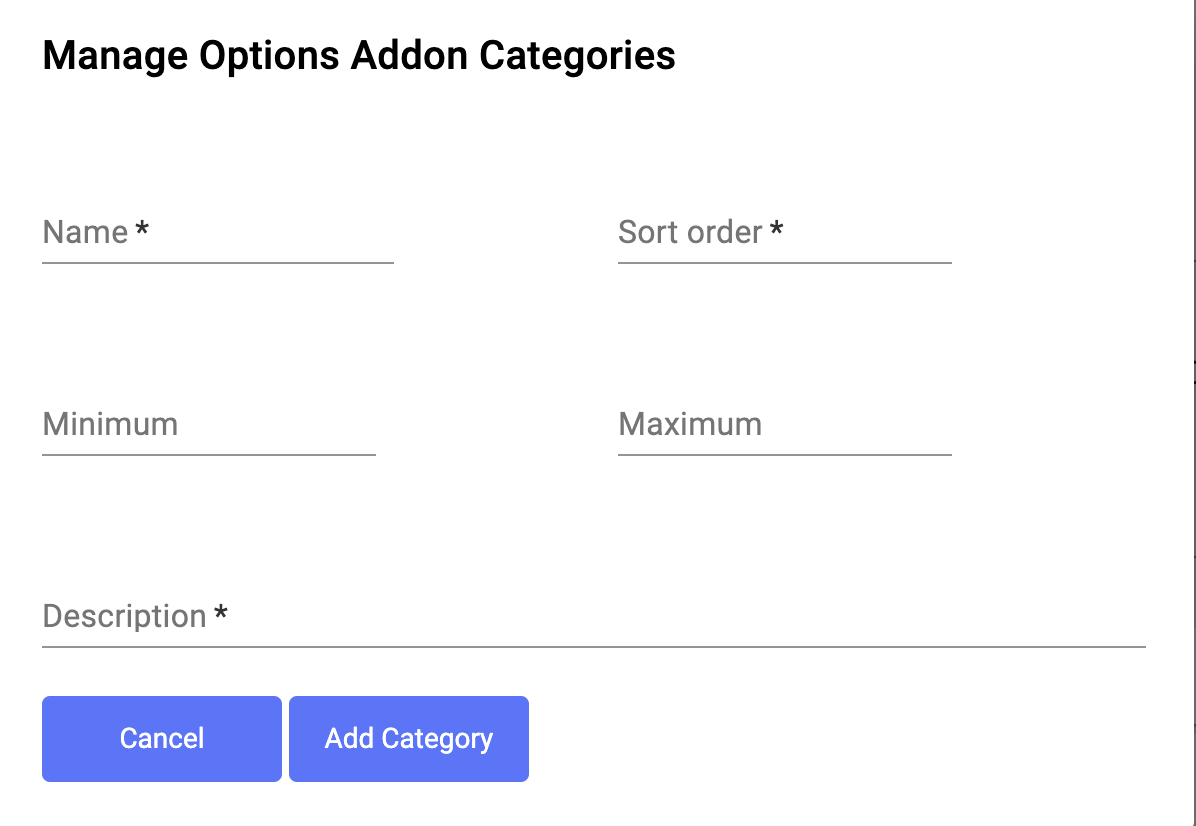
On the above form complete the name, sort order and minimum and maximum amounts.
Add the description of the category.
Once added click Add Category.
Once added you need to click the plus sign to start adding your option into your category.
Once you click plus you will see a form like below

Complete the name, quantity (inventory), sort order and description.
You can also upload the image of the option.
Once ready click add option.
This completes the guide for setting up your menu.
To learn more about Kayana products or how to grow your business using self-service, contact sales@kayana.co.uk.